Sunday, 30 December 2007

Keyboard shortcut of the week: save and backup regularly

Your PC can crash at any time. Not a comforting thought I know, but one that should prompt us all to save our work as often as possible. So, for this end of the year post I will extol the virtues of saving regularly, and by extension, of backing up your files.

Firstly let's deal with saving your files regularly: to do so, simply hold down the Ctrl key and press S.

If you wish to use a different filename each time you save, hold down the Alt key and press F then A. This will open up the 'Save as...' dialog box.

Now the backing up your files. Since we are fast approaching a new year, now would be a good time to back up all your essential files. There are a myriad of ways of doing this such as using USB flash drives to backup your current projects, or using a DVD writer to back up many of your files in one go.

Another option is to set up a webmail account with lots of storage capacity as offered by the likes of Yahoo! and Google to which you can email the files you are working on. Or you could try other online storage facilities like box.net.

So make at least one New Years resolution: back up your files.

Monday, 10 December 2007

The mystery of the disappearing Taskbar.

Once in a while, Windows gets into a terrible state and the Taskbar and its Start menu disappear. This is because the software that manages these, called the Windows Explorer shell, has crashed. To deal with this, without logging off and on the computer, you have to end any existing sessions of Explorer and run a new one.

To end existing Explorer sessions hold down the Ctrl and Alt keys and press the Delete key. On some versions of Windows this will open up the 'Windows Security' dialog box, if so then press the 'Task Manager' button; on other versions you will be taken straight to the 'Task Manager' program.

To stop the Explorer shell, go to the 'Processes' page and look for 'explorer.exe'. You can sort the processes into alphabetical order by clicking on the Image Name heading. If you find an entry for 'explorer.exe', highlight it and click the End Process button and click Yes on the warning dialog. If you don't find an entry for it you can go straight to the next step.

To restart the Explorer shell, click on the 'File' menu in Task Manager and select 'New Task (Run...)'. This will open the Run dialog box, into which you can type 'explorer' and click OK. The Taskbar should now reappear.


Sunday, 9 December 2007

From screen to video: recording Windows

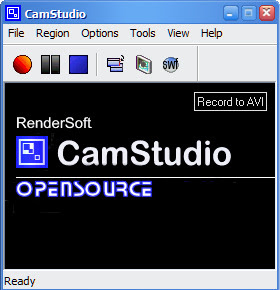
As you will have seen in my last post I have at last added video to this site. I used a handy freeware application called CamStudio to record what I was doing on my screen.

This software has some excellent features that include: recording of vocal commentary; addition of captions; and even picture-in-picture video of yourself if you have a webcam. There is some help for using the software at Nick the Geek's Support Helpdesk, but I will give you a few tips to get you started.

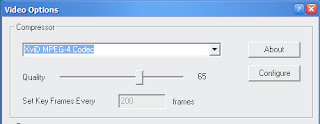
Firstly, it is best to select a different video codec (the way that the video is encoded and compressed) than the default one to keep the file sizes small. From the Options men select Video Options. Pick a compressor from the list. There is a lossless video codec available to download on the CamStudio site. You can also reduce the quality of the video on the Video Options page to further reduce the size of the video file. You will have to make sure that the people who view the video have the correct codec installed on their machine.

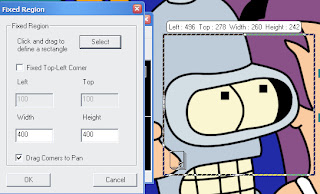
Next, select the area you wish to record. To do this pull down the Region menu and select Fixed Region (you can also record the whole screen). Click on the Select button and hold down the left-button on the mouse and drag it to select the region of the screen you wish to record.
It is best to make sure that the height and width are an even number of pixels, as this is a requirement of some video codecs. Click OK.

You can now hit the record button, the red circle, move the selection box over the part of the screen you wish to record and left-clik the mouse, and now the software will record anything that happens in that part of your screen. Click the blue square to stop recording, and then select a file name and a location for the video file.

Check out the other settings for adding audio and webcam screen-in-screen. Happy movie making.

Saturday, 8 December 2007

Keyboard shortcut of the week: control your selections

If you ever have to select more than one item at a time in a Windows program then you can use the control key, generally marked Ctrl. I find this technique particularly useful for dealing with my emails. I can hold down Ctrl and click on each spam email in turn, then take my finger off Ctrl and hit the Delete key so get rid of them all.

Using Ctrl to select multiple items also works well in Window Explorer - the software you use to browse files and programs within Windows. To try it out open up your My Documents folder, hold down the Ctrl key, and left-click on a few items with the mouse. Each item should be selected as you click on it. When you release the Ctrl key you are free to drag and drop all the files, or right-click on any one of them to apply a process - such as delete, cut or copy - to them. A much quicker way of performing a task on many files than doing each one separately.

You can also use the Ctrl key and 'lasso' items in Explorer. To 'lasso' items hold down the left mouse button and drag it to create a box that selects several items in one go. You can hold down the Ctrl key and use this technique to select several sets of items. See the following video for a demonstration of this technique in action.


Note: when 'lassoing' items with the Ctrl key pressed, be careful not to click on the icons as you will make copies of the selected files.

Friday, 7 December 2007

Tuesday, 20 November 2007

Keyboard shortcut of the week: born to run

You may have noticed that the Start menu has an item called 'Run'. The Run facility is a bit of a throw-back to the days of DOS, when we had to type commands to run programs rather than double click on icons. Nevertheless, it is still a useful tool in the Windows environment.

You can open the Run box by clicking on 'Run' in the Start menu, or you can use the keyboard shortcut: hold down a Windows key and press R.

The Windows keys have this symbol on, and are generally located near the Alt keys.


Once you have opened up the Run box, simply type in a command and hit return. To get you started here is a list of commands and the programs that they open.

calc - calculator
notepad - unsurprisingly this opens the notepad, which is a simple text editor
iexplore - Internet Explorer
firefox - Firefox
winword - Word
excel - (I think you can guess)
powerpnt - PowerPoint

[For an exhaustive list of other commands see this article on FixMyXP.com]

Another advantage of using the Run dialog is that you can quickly browse to a folder on any drive, for example you can open the 'C drive' by typing C: in the box.

The dialog will offer a drop down menu of options, so if you were to type c:\doc it should offer the option to click on c:\documents and settings. If you then type another \ at the end it should present a list of every file and folder in 'documents and settings', although, sometimes this take a little while.

So, use the Run dialog and feel like an 'old skool' techie.

Monday, 19 November 2007

Putting new buttons on toolbars in MS Office

A while ago I wrote an article that suggested that rather than printing directly from web browsers, such as Internet Explorer, it is better to copy the information that you want into a word processor and print it from there. In that article I mentioned the use of the 'Paste Special' in Word, which enables you to remove formatting from the information that you paste. In this article I will explain how to put a button for 'Paste Special' onto the toolbar in word. This technique can also be used to add any of the other available buttons onto the toolbar.

Open up word and right-click on one of the toolbars, which are at the top of the screen below the menu and look something like this:


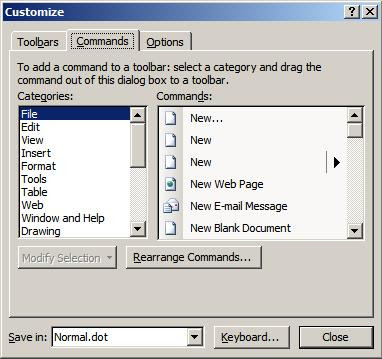
From the menu, select 'Customize...', which will open a dialog box. Click on the 'Commands' tab.


Select 'Edit' from the left-hand menu, because the 'Paste Special' tool is listed in the 'Edit' menu. Scroll down through the list on the right-hand until you see 'Paste Special' then left-click on it and hold the mouse button down. The mouse pointer should change to an arrow pointing at a rectangle with a square to the bottom right, which will have an X in it initially.

Move the pointer up to the toolbars and release the mouse button when it is in a suitable position: next to the normal paste button for example. You will notice that the mouse pointer changed appearance again when you hovered over the toolbar, with the X being replaced with a + to let you know that the new button can be placed there.

Your toolbar should now look something like this:

If you wish to remove a button from the toolbar, follow the instructions above for opening the 'Customize' dialog, but rather than drag from the dialog box to the toolbar, click on the button you wish to remove from the toolbar and drag it into the dialog box.

This process also works in the other Microsoft Office applications such as Excel and PowerPoint.

Monday, 12 November 2007

Sounds & videos in PowerPoint on a different PC

If you are setting up a PowerPoint presentation that has audio or video content, make sure that the media files will be available when you give the presentation. For example, you have a slideshow that plays an mp3 when a certain slide is shown. You must make sure that the mp3 file will be accessible wherever you want to show the presentation, that is, if you are using a USB memory stick make sure that the media files are on the stick before you create the link to them in PowerPoint, or if you are using a CD-Rom, make sure all the media files are in the same folder as the PowerPoint file and then burn them all together in the same folder on the CD-Rom.

Sunday, 11 November 2007

Bring files back from the dead, continued...

The authors of PC Inspector File Recovery recommend that you install it on a different drive from the one you want to retrieve lost files from. This may not always be possible, but if you have a second drive or a USB memory stick, then install the software onto one of these.

Once installed, run the software.

Select your language when prompted.

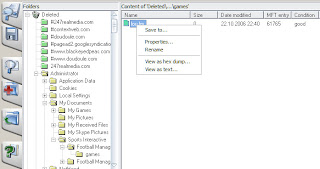
Click on the 'Recover Deleted Files' tab as shown on the left of this image.

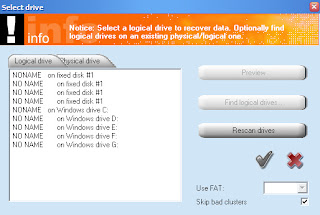
As you can see, I have a number of drives on my PC. On most machines there will only be two drives listed in the list. Select the drive you wish to search for deleted files, usually this will be 'Windows drive C:', and click on the tick.

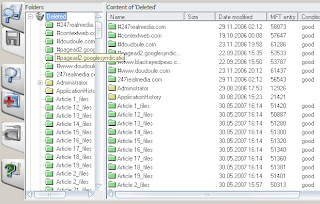
The software may take some time to scan your drive, when finished it will present you with a list of deleted files and folders that it has found. Note that each file's condition is listed and even when the file condition is 'good' it may not be restored in totality.

Try to locate the lost file in the list. If you find it, right-click on it and select 'Save as'. If possible select a location of a different hard-drive or a USB memory stick. With luck your file will be restored.

If you can't find your file in the list, try searching for it by clicking on the magnifying glass icon, and typing in the filename of the lost file. The search engine supports wild-cards. Click here for a previous post that explains the use of wild-cards. If the software finds your file you can right-click on it and save it as above.

This guide explores only one aspect of the software as a file recovery tool. Check out the help file and the website for instructions on the other features, but be warned, these tools are not designed for novices.

Note: I had some problems using this software on NTFS drives. To find out if your drive is NTFS or FAT32: go to My Computer select your drive. The file system should appear in the 'Details' section on the left-hand side. Try looking in the drives listed as being 'on fixed disk' as well as those the 'on Windows drive' entries on the 'Select drive' dialog. To select a different drive open the Object menu and click on Drive...

Monday, 5 November 2007

Bring files back from the dead

Even after you have deleted a file, and emptied the Recycle Bin, you may still be able to recover the file. This is because the data in the file has not been removed, at least until the drive is defragmented, rather Windows just ignores the data that is there, treating it as if it was empty space.

The great advantage of this system is that you may be able to recover files that you accidentally deleted since the last time that you defragmented, however, you will need a piece of software that will enable you to reconstruct the file from the raw data. My preferred software for this task is PC Inspector's File Recovery. Whilst free to download and use, it is still a fully featured and powerful piece of software. It is not the most intuitive piece of software ever written, so I will be writing a tutorial later this week explaining how to recover a file using it.

As an alternative, FreeUndelete, is more user friendly, but because I have not used it as often as PC Inspector's File Recovery I cannot vouch for how well it works.

Friday, 2 November 2007

Keyboard shortcut of the week: what`s on the menu?

You can open any menu using your keyboard. As you may have noticed, each menu title has one of its letters underlined. To open the menu, hold down the Alt key and press the key corresponding to the underlined letter.

In the case of the above menu, Alt & F will open the 'File' menu, Alt & E will open the 'Edit' menu, and so on.

Once the menu is open, you can use the cursor keys to navigate: up and down will move the focus up and down the list of menu items; the right and left cursor keys will select the next menu to the right or left (except when you have a sub-menu entry focused - more details below). To select a menu item press the Return key.

You will notice that some of the menu entries have letters underlined too. These can be quickly selected by opening the menu and then pressing the key for the underlined letter. For example if you press Alt & E the 'Edit' menu will open, if you then press A then the application will 'Select All' - of course you could just hold down Ctrl and press A, but not all menu entries have another keyboard shortcut associated with them.

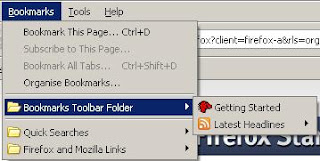
Some menu items have a sub-menu, as with the example to the right. To open these using the keyboard press the right cursor key.

To close an open menu use the Escape key.

Tuesday, 30 October 2007

I can see clearly now...

Eye strain is a hazard to anyone who uses their computers for any extended period. So anything that eases the pressure on the eyes is a bonus. To this end, Microsoft have developed a tool for making text more legible called ClearType Tuner.

The ClearType Tuner only works on Windows Vista and XP, and is available as a web-based tool here. You will be required to choose which is the clearer text from a variety of options a couple of times, and then - hopefully - text should be clearer on your screen. Windows XP users can also download a Control Panel version from the Microsoft XP Power Toys page.

If you are a Vista user and wish to switch off ClearType check out Diana Huggin's instructions on the excellent Lockergnome site.

Monday, 29 October 2007

The Windows Taskbar explained

The Windows Taskbar is usually to be found at the bottom of the screen, although it can be moved to any edge. It includes the 'Start menu' button, toolbars, a button for each application you are running, icons for other programs that are running at the time.

I will gloss over the 'Start menu' button - because all it does is open the start menu - and move straight on to the toolbars. Most versions of Windows will display the 'Quick Launch' toolbar by default. This toolbar will look something like this.
To add a new button to this toolbar for a different application, simply drag and drop the application's shortcut to the toolbar. You can drag and drop from the Desktop or from the Start Menu. To delete a button, right-click on it and select 'Delete'.

There are a number of other toolbars available, including one that will offer shortcuts to the 'Links' directory in your Internet Explorer favourites. The Windows Media Player taskbar is quite stylish, if you switch it on and minimise Windows Media Player, it will show a toolbar that includes the media player's controls rather than the usual plain button. To enable (and disable) the other toolbars, right-click on an area of empty space on the Taskbar, then click on the various entries in the 'Toolbars' sub-menu to switch them on and off.

To move the toolbars around in the Taskbar, make sure that the taskbar is not locked. To unlock the taskbar, right-click on an area of empty space on the taskbar and click on 'Lock the Taskbar' to remove the tick. You can switch it back on when you are happy with your arrangement in the same way. Once the Taskbar isn't locked you can drag the toolbars around on the Taskbar. You will also need to unlock the Taskbar if you wish to move it to another edge of the screen by dragging and dropping it.

Note: this feature may not be enabled if you are using Windows 2000 or an earlier version.

Application Buttons
As you no doubt know, you can switch between applications by clicking on the buttons on the Taskbar. If you right-click on the buttons you are presented with a variety of options for displaying the application, such as maximise and minimise, and also an option to close the application - a handy way of closing an application without bringing it up on screen.

Systray
The last section of the Taskbar is called the Systray, which looks something like this:
The icons in the Systray represent programs that Windows automatically runs at start-up, usually programs like anti-virus software, the audio controller, and video card control software. You can access the menu for each of these by right clicking on them. If you have many icons in your Systray you may want to consider stopping some of them from running, as they take up system resources and are usually far from critical. For advice on changing the programs that run automatically check out my post on the subject.

Sunday, 28 October 2007

"Bloody Computer!" Author Wins Award

Last week, Colin at Free PC Security gave me the Community Blogger Award. This prize was recently created by Cellobella at Red Sultana, to celebrate those that reach out to the wider community.

I am honoured to receive this award, because it comes from fellow bloggers, and because the ethos of the award is for winners to pass on the award to worthy recipients. As such, I am also honoured to present the award to the following three bloggers:

Etienne Teo - for good advice for bloggers wishing to monetise and develop their sites.

Mark R. Stoneman - for efforts in promoting the historian blogger community.

Shirley Gibson
- for the variety of blogs she writes, and for blogging community work.

Tuesday, 23 October 2007

Keyboard shortcut of the week: screen capture

If you wish to capture what you have on your screen as an image you can do so by pressing the Print Screen key (sometimes abbreviated to Prt Scr or similar) - on most keyboards this key will be found next to the F12 key, above the Insert key.

This will put an image of the screen into the 'Clipboard', which is the name for the "holding area" where windows keeps things that you have copied. You can then paste this image into any program that accepts pasted images, such as image editors or word processors.

Windows includes an image editor, called Paint, which is found in the 'Accessories' folder on the Start Menu program list. This application enables you to edit the screen image, should you wish to copy a section of it, or change its size, and save it as an image file.

Most word processors also include a few limited image manipulation features. In MS Word there is a toolbar that includes image manipulation tools, such as brightness and contrast adjustment, and a tool to crop the image. To show it, right-click on the image you wish to edit and click on 'Show Picture Toolbar'.

Monday, 22 October 2007

Five tips for buying a new PC

1) Buy a good monitor
The monitor is the peripheral that you will interact with the most. For the sake of your eyesight and to prevent headaches from extended use, make sure that you purchase a quality monitor. Make sure that the monitor is the right size for you, don't be pressured into buying a larger monitor than you need. For most purposes a 17" screen will serve well. Also, read users reviews for the monitors even if you don't read reviews for anything else.

2) Hard-drive capacity
The more the merrier. Hard drive space is like cupboard space: you can never have enough of it, especially in these days of multimedia computing. The capacity of the hard-drive is more important than its speed. 100 gigabytes should be enough for most purposes, but if you know you are going to install many games, or store lots of movies or music files you may decide to buy a PC with a larger drive. Better to buy enough to begin with rather than buy a second drive later.

3) Build Quality
This is particularly important when selecting a laptop to buy. If you can, try and see the laptop models "in the flesh", check out the manner in which the monitor is attached to the rest of the laptop, and make sure the keys don't wobble around. The build quality is often the best indicator of how good a PC is overall.

4) Added extras
Make sure that you need all the added extras that come with the PC packages you are looking at. When it comes to additional software, decide whether you will be better off downloading and installing freeware virus checkers etc. Sometimes the additional virus checker only includes one years worth of updates.

Decide whether you really need the packaged hardware. Would you prefer to buy a printer separatelty? When it comes to printers check how much new ink cartridges cost, as you may end up with a printer bundled with your PC that will cost more in ink than buying a separate printer which uses cheaper ink cartridges

5) Power Supply
Find out what wattage the PC's power supply is. Again, this is a case of the more the merrier. I have known some PC manufacturers to install power supplies that are barely adequate to power the PC, let alone any additional cards you put in it later. Avoid anything less than 240 watts output. It may be difficult to find out the power output if you are purchasing online as it is rarely included in specifications, however, you could email the manufacturers who should be more than happy to respond (if they think there is a likely sale).

Friday, 19 October 2007

Speed up your PC: streamlined visuals

Over the years the Windows interface has become increasingly visually appealing, however, these graphic effects can have an impact on performance.

The effects of effects
Windows 2000 and XP users can switch off some of these effects in order to get better performance from their PC. To do this, right-click on the desktop - away from any icons and select 'Properties'. This will open the 'Display Properties' dialog box. On this box select the 'Appearance tab'.
Click on the 'Effects...' button, and the following dialog box will open.
To increase performance make sure that 'Show shadows under menus' and 'Show windows contents while dragging' are not ticked. Click 'OK' on all the boxes when you have made your changes.


Pick a better wallpaper
Another factor that may impact performance is the size of the image you use as your desktop background - also known as a wallpaper. You can use any size of image as your wallpaper and Windows will resize it to fit the screen. By picking a smaller image, you will free up some system resources. Of course, you can free even more resources by having a plain background with no image at all.

Thursday, 18 October 2007

Keyboard shortcut of the week: the great escape

The escape key (marked 'Esc' on most keyboards) has a number of functions, but probably it's most useful function is for closing dialog boxes (those small windows that open within a program, such as the 'Save as...' box) where it is the equivalent of pressing the 'Cancel' button or the close button in the top right hand corner - the equivalent of pressing the 'OK' button is the return key.

Pressing the escape key also close menus, including the start menu, which can be opened using the windows key (the one with the Windows logo on).

Tuesday, 16 October 2007

Monday, 15 October 2007

Link to Bloody Computer!

If you wish to link to Bloody Computer!, copy the following code and paste it into your website's html file or add it to your blog. Please leave a comment if you need any help doing this.


The link will look like this:

Three free video tools

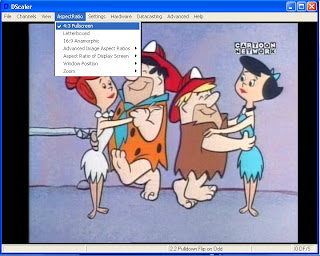
If you have a TV tuner card or video capture card then you can do worse than give dscaler a try. This free software combats the problems of interlacing and other visual quirks in captured video. It enables you to capture video from a hardware source and apply a variety of effects and filters to it in order to improve the quality of the output video file.

Once you have captured a video from an external source, you may wish to edit it. For professional video editing you have to spend serious money, but there is a free alternative: Virtual Dub. Whilst it is not as fully-featured as professional video editing software, Virtual Dub is still a powerful piece of software for editing or changing format of a variety of video file types.

Real Alternative is a small package that enables you to watch RealMedia files without installing Real Player. After installing this codec pack (software that translates digital information into video or sound) you are able to open RealMedia files with various media players, including VLC and Media Player Classic (both excellent freeware media players).

Wednesday, 10 October 2007

Keyboard shortcut of the week: search and find

If you wish to bring up Windows' file search minimise all your windows and press F3. You can also search within a certain folder too: open that folder up in Windows Explorer (the name for the program that opens when you double click on 'My Documents', 'My Computer', etc) and - you guessed it - press F3.

Pressing F3 opens search dialogs in many other programs as well: in Internet Explorer it opens (and closes) the vertical search bar; in MS Outlook it opens up the 'Advanced Find' dialog. Try pressing F3 when using applications that have some sort of search facility.

In a similar vein, you can open up the find facility in many applications by holding down the Control ('Ctrl') key and pressing F. To explain the difference between search and find, consider that you will search for a web page and when you have opened it you can find text within it. In MS Word Ctrl + F opens the 'Find and Replace' dialog. As with F3, try it out in any program that has a find facility.

Of course some programmers use slightly different standards. For example in Firefox both F3 and Ctrl + F open the find word dialog at the bottom of the screen.

Happy hunting.

Monday, 8 October 2007

Four Hardware Tips: CD/DVD drives and scanning

Eject the CD or DVD drive when your PC is switched off
You will need some sort of pin (or straightened paper clip) which you can push into the small hole on most CD or DVD drives to manually eject the tray.

Stop your DVD playback stuttering
If Windows detects a problem with one of the drives on your PC, it may reset the disk controller mode to a slower level, causing DVD play back to halt intermittently.

To fix this, right-click on 'My Computer' and click 'Manage'.

This will open up the Computer Management console: click on 'Device Manager'.

Open up 'IDE ATA/ATAPI controllers, and right-click on 'Secondary IDE Channel' and click on 'Uninstall'.

Restart your PC.

Windows should re-detect the controller and set it back to a quicker mode.

Prevent scans from showing details from the opposite side of the scanned sheet
When scanning some media, particularly newspapers, you will notice that text and images from the other side of the sheet appear on the scan. To prevent this place a dark piece of cardboard - preferably black - on top of the sheet that you are scanning.

How big?
Scanning software generally defaults to a fairly high resolution for scanning (measured in dpi - dots per inch). If you are using the scanned image or text in a word processing document or a slide-show you probably don't need the dpi setting to be all that high - 90dpi should be enough.

Setting a lower resolution means that your documents won't be so large, and if you do a lot of scanning into documents this tip will help save hard-drive space.

Sunday, 7 October 2007

Wednesday, 3 October 2007

Time for a purge: reclaiming hard-drive space

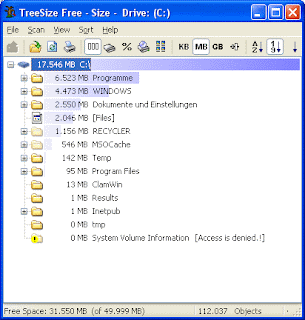
If you are running low on hard-drive space it may be time for a purge of files that you no longer use, or have no wish to keep any more. In my previous post on this subject I suggested installing and running the excellent Treesize to find out the size of each folder, and I explained how to clear the cache in your web browser. In this post I will describe what steps to take in a more general purge of unwanted files.

Removing unwanted applications
From the Control Panel and open either 'Add or Remove Programs', or 'Uninstall a Program' (if you use Vista). Go through the list of programs and remove any that you don't use any more. This may sound like obvious advice, but the easy availability of freeware programs means that many of us have collections of applications installed on our machines that we played with once or twice and then forgot about.

Removing non-essential files
Over time, Windows collects various temporary files, logs and other non-essential files. To delete these, go to the 'Start' menu and select 'Search'. You may then have to select 'All files and folders.' In the search field type '*.gid' - without the quote marks - and hit the Return key. Windows will then search your PC for these index files, which help files generate. It should be safe to delete all of these, however, you may want to keep these files in the Recycle Bin for a while, just to be on the safe side. You can repeat the process searching for the following:

'*.chk' (these are files created by disk check process)

'*.dmp' (these are memory dump files created when certain versions of Windows crash)

'thumbs.db' (these are created whenever you look set the folder view option to 'Thumbnails')

Switching off thumbnail cache
If you have a lot of images stored on your PC, you may want to switch off thumbnail caching. This will prevent Windows from creating any new 'thumbs.db' files, but will mean that the thumbnail view of a directory containing lots of images will take longer to show them all.

To switch of thumbnail caching, open 'My Computer' (or any other Windows Explorer screen) and select 'Folder Options' from the 'Tools' menu. On the dialog box that opens, go to the 'View' tab and tick 'Do not cache thumbnails'.

Don't forget your emails
If you use an email application on your PC, rather than webmail, then your emails will be taking up some of your hard drive space. So, in order to recover some hard drive space it may be time for an email purge. If your email application has a 'Recycle Bin' or 'Deleted Items' folder, remember to empty that when you are finished purging. If you have attachments in the emails that you have also saved elsewhere on your PC, then you are storing the same thing twice: delete one or other of them.

Hopefully these tips have enabled you to recover at least enough hard drive space to stop those annoying 'Low Disk Space' messages. If any of the above processes didn't work on your version of Windows, please let me know as each different version of the OS has its own quirks, which I may have forgotten.
Tuesday, 2 October 2007

Keyboard shortcut of the week: help!

Just about every Windows application has a help file, or at least connects you to a webpage that provides help. Nevertheless, users with problems frequently forget about the help file. Often - as with the Microsoft Office products - these help files are searchable and sometimes even include tutorials.

You can access the help file for any program (or indeed for Windows itself) by pressing the F1 key.

So, before you seek the advice of a techie or search the web for help, hit F1.

Monday, 1 October 2007

Print the web and save the world

Web browsers such as Internet Explorer and Firefox are notoriously bad at printing. You can end up with many disparate pages with sidebars and parts of images on, you have no idea how many pages are going to come out, and you use more paper than you need; which, can't be good for the environment - let alone your finances.

This is not the fault of the browser programmers, but rather, it is 'the nature of the beast.' One of the advantages of web pages is that they are not subject to the limitations of the printed page. Many web programmers are kind enough to supply a printable version of their pages. [I must find a way of adding them to this blog... maybe using the RSS feed...] Anyway, if there is no link to a 'printer friendly version,' then the best thing to do is to copy what you want and paste it into a word processor, which will then bypass all the problems mentioned above.

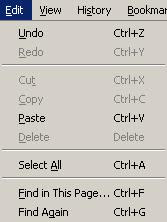
You can select the information you want by clicking and dragging with the mouse, although, this can be an irritating process, as your selection often randomly includes images that you don't want. When pasting into your word processor, you can make your life easier by using 'Paste special;' which, you should find in the 'Edit' menu. This will give you a selection of text formats.

If you just want the plain text from the web page and not the images, then select 'Unformatted text.'

If you wish to print both images and the formatted text, that is, keeping the same font used on the web page as well as any text that is bold or italic, then select 'Rich text format' (unfortunately this option is not available for text copied from Firefox.)

Avoid 'HTML format' as this will attempt to reconstruct the web page as a word processed document, often recreating the problems that you were trying to avoid. This option often takes a while to complete too.

You are then free to edit the text to your heart's content. You can change font sizes and remove 'white space' to save paper. You also have the option of adding your own notes to the text. So, reduce your printer output and save the world today.

Saturday, 29 September 2007

"Can you hear it?" Three Freeware Audio Applications

Winamp has long been a popular mp3 player developing a large user community. Members of this community submit a plethora of skins, plug-ins and other add-ons to the Winamp website. Winamp also offers support for iPods and other mp3 players, and functions as an adequate video player.

If you have ever made an audio mix CD from mp3 files, you have probably been annoyed to find that all the tracks play at different volume levels, spoiling that overall ambiance you wished to create with your selection of top tunes. If this problem is a source of vexation for you, try mp3gain. With this program you can quickly balance the levels of a selection of mp3 files, so as to further impress that prospective partner, work colleague, or friend with your eminently good taste.

The best freeware audio editor available is Audacity. It provides support for mp3 files - as well as a number of other formats - and offers enough editing features and effects to meet most user's needs. Unfortunately, Audacity does not support proprietary formats such as wma, but there are plenty of audio file converters available like dBpoweramp.

Friday, 28 September 2007

Keyboard shortcut of the week: Excel

Following on from the megapost of word-processing keyboard shortcuts from earlier this month, here is a selection of keyboard shortcuts for Microsoft Excel.
  • You can navigate around the grid of cells by using the cursor keys.
  • Hold down Ctrl and press Home to jump to the top right cell (A1).
  • Hold down Ctrl and End to jump to the last cell on the spreadsheet with any information in
  • If you wish to edit the contents of a cell press F2

As with word processing, you can hold down the Shift key to select: if you hold down Shift and press the right cursor key then you will select the current cell and the one to the right of it. If you continue to hold down the Shift key and press the down cursor key you will also select the two cells below the ones you already had selected. You can thus hold down the Shift key and press different cursor keys to select different rectangles of cells.

Many of the keyboard shortcuts that work for word processing also work in Excel: holding down Ctrl and pressing B selects bold text; Ctrl and C will copy text, etc.

Tuesday, 25 September 2007

Word to the wise: webmail woes

This is an issue that has cropped up a couple of times at the university where I work.

If you send yourself a document that you are working on, to continue working on it on another PC, remember to save the attached document onto that machine before you start to make changes to it. It is easy to forget this, open the document and start making changes. If you then hit the save icon it will not always save and when you then close whatever program you are editing the document in, your changes will be lost. This is particularly the case for documents accessed via webmail. If you remember to 'Save as' rather than just 'Save' you will be OK, because it will prompt you for a name and location where you wish to save it. Nevertheless, it is better to get into the good habit of copying the document you attached to the email onto the PC before you expend effort making alterations.

Sunday, 23 September 2007

Weekend website: What is this file?

So here is the scenario: you have been sent a file attached to an email. You double click on it - after making sure that it is not a virus or some other malicious file - and you are told that it is an 'unknown file type'. You need to find out what type of file it is, and what programs will open it.

To do this you look at the last few letters after the last '.', e.g. word documents will end with '.doc' (you may not see these extensions for file types that your installation of Windows recognises - to see them: double click on 'My Computer'; select 'Options' from the 'Tools' menu; select the 'View' tab and deselect 'Hide extensions for known file types'.)

So you know what extension the file has, but still don't know how to open it. There are a number of web sites that provide lists of know file extensions. All offer a search tool, so you can just type in a file's extension and find out what programs you need to open it. So here are a few such sites:
Check out this post for details of a website that will convert files to a type that you may be able to open with your existing software.

Friday, 21 September 2007

Keyboard shortcut of the week: Firefox

This week's keyboard shortcuts are all for Firefox - some of them may work in Internet Explorer. Recently, Microsoft have started copying features previously implemented by Mozilla in Firefox, possibly including the keyboard shortcuts. Please let me know which ones work in IE.

To cycle through your tabs rightwards: hold down Ctrl and press the Tab key.

To cycle through tabs leftwards: hold down Ctrl and Shift and press the Tab key.

To open a new tab: hold down Ctrl and press T.

To close the current tab: hold down Ctrl and press W.

To jump to the address bar - where you type in a web address: Press F6 (thanks to glytch for this one).

To open and close the Bookmarks tab: hold down Ctrl and press B (Note: if you are in a rich-text editor on a webpage this will select bold text instead.)

Wednesday, 19 September 2007

What to do when your PC hangs

So, your PC isn't doing anything, the screen is a mess, the hard-drive is whirring away. Is there anything you can do, rather than just reach for the reset button?

Here are my top tips for dealing with those times when Windows hangs.

Don't keep clicking things

Windows buffers (remembers) all these clicks and will implement them when it catches up, preventing you from continuing with what you want to do, and possibly causing havoc. Show a little bit of patience.

Check to see if your PC has crashed
Before you hit that reset button it is wise to check if your PC has actually crashed. To do this simply press the Caps Lock key, and check whether the Caps Lock light goes on or off; if it does then your Windows session may be recoverable. You may have to wait a few seconds to see a response.

Use the Task Manager
All recent versions of Windows have a built in application called 'Task Manager.' To run it simply hold down Ctrl and Alt, and press Delete (note: Windows 2000 users will then have to press the 'Task Manager' button on the dialog box that opens.)

As with all these tips, you will have to wait a while to see if it appears. When it does, check the 'Applications' tab to see if any of the programs you are running have a status of 'Not Responding.' If they are, click on one to highlight it then and click the 'End Task' button. Do this with any other programs that are not responding, then cross your fingers.

If Windows starts working again it is best to save all your work and restart the PC. A clean restart is always preferable to a nasty reset.

Making Windows run faster: upgrade your PC

Mo' Memory
One of the major causes of windows running slowly is a lack of physical memory (called RAM). When this physical memory becomes full, Windows shuffles the information used by inactive programs into a file on your hard-drive called a 'page file' (or sometimes a 'swap file'). This shuffling back and forth of information takes time and slows the operation of your PC down.

Buying and installing more RAM is one way to give your PC a speed boost. There are many different types of RAM available, and you have to install the one that is correct for your PC. You can use the Crucial Memory Advisor™ tool to find out what types of memory your PC supports (Crucial are a major supplier of memory with prices often cheaper than you will find elsewhere). If you need advice about installing your new RAM, check out the How to install RAM article at lifehacker.

Veni Video Vici
Many computers these days have video controller built onto the motherboard (the motherboard is the big circuit board in your PC that all the other devices connect to). If you have such a system, the PC will allocate part of the available RAM to your video hardware, thus making it unavailable for Windows. Also, some software - especially games - relies on a sizable amount of video memory being available. So, another way to give your PC a speed boost is to upgrade the video card. Check out Ryan Pollack's article How to Upgrade and Install a Video Card?

If you have inbuilt video hardware on your motherboard you may have to switch it off in the BIOS (this controls the hardware of your PC before Windows starts), in order to do this consult your manuals. Note: if you have lost the manual you may be able to download it from your PC manufacturer's website.

Pimp my PC
Of course the best upgrade to make your PC run faster is to replace the processor (also known as CPU) with a faster one. The CPU is analogous to the engine in a car, so the powerful it is, the faster the PC will run. Replacing the CPU is not a simple task and should be avoided by computer novices. Your PC may not support all processor types and the actual task of replacing a CPU can be rather fiddly. For this, it would be best to seek the advice of an expert.

Note for laptop users
Of these three upgrades, only the first really applies to you. Changing graphics and CPUs on laptops would either be impossible or expensive. From personal experience I warn you to never take your laptop apart, the manufacturers really jam everything in there, and the whole thing becomes some sort of fiendish puzzle.

Saturday, 15 September 2007

Weekend website: More anwers than questions

Yahoo Answers offers you the chance to ask questions in a user-friendly open forum. The forum is broken down into various categories such as 'Pets', 'Health' and, of course, 'Computers & Internet'.

CNET provide various forums (or is that 'fora'?) where you can ask computer-based questions; including one aimed at 'Computer Newbies' in particular.

Both sites require registration to submit and respond to questions. I check both regularly for opportunities to share my *ahem* sagely advice.

Friday, 14 September 2007

Wednesday, 12 September 2007

Five top freeware applications

Before spending your hard earned cash on software, it is always worth looking to see what is available for free. In this article I will look at five free applications that I use myself.

First up, and probably most importantly, we have a virus checker. AVG anti-virus free edition has all the features I want from anti-virus software. It loads quickly, doesn't take up much system resource, updates itself regularly, and only bothers me when it finds a problem.

After viruses, spyware is the next major problem that arises from using the Internet. I use Spyware Terminator, which has many of the same virtues as AVG anti-virus, in that it is not constantly bothering me with messages. In my opinion, such software should sit quietly in the background doing its job.

Quick tip: when you run a scan on your PC looking for spyware the software 'looks' at each file, which means that the virus checker also checks that file. So by running a spyware scan you also effectively run a virus scan.

Do you use Windows Media Player to watch video files? Do some videos not load into it? Does it complain about needing something called a 'codec'? You can do worse than try the VideoLAN VLC media player. VLC supports most common media types, both audio and video, and is available in versions for Linux and Macs too.

The last two freeware applications have been featured in previous articles here. TreeSize is a program that provides a graphical representation of how much hard-drive space each folder is using; very useful for working out where all your hard-drive space has gone. The other is Startup Control Panel, which provides a means to manage which programs run automatically when Windows starts.

Friday, 7 September 2007

Weekend website: Media Convert

Anyone who has used Windows for a while knows there are a dazzling array of file types. Maybe the word processor you use at home is different from the one you use at college; maybe your job requires all reports to be submitted as pdf files; or maybe someone has sent you an audio file in Ogg Vorbis format and you are completely nonplussed. As not all applications support all file types you need an easy way to convert some files into a format you can use.

The Media Convert site enables you to quickly convert files from one format to another whether office documents or video files. I have used it a number of times and have found it a lifesaver. Media Convert supports dozens of file types and is definitely worth bookmarking.

Wednesday, 5 September 2007

Keyboard shortcuts of the week: Faster word processing

Do you wish to be able to use your word processor more quickly? Do you want to be able to edit a piece of text without having to reach for the mouse every few minutes? Then this week's mega-selection of keyboard shortcuts are for you. They should work in any text editor on Windows, whether a word processor or a comments box on a web page. I have included a text box as part of this article so you can play around with the various key combinations. For those interested, the text in the box is the opening paragraph of Candide by Voltaire.

We will start with quick navigation links.
  • The Home key will move the cursor to the beginning of the line (on most keyboards this key is in a collection of 6 keys located above the cursor keys).
  • The End key will, unsurprisingly, move the cursor to the end of the line.
  • If you hold down Ctrl and press Home, the cursor will move to the beginning of the document. Ctrl and End will take the cursor to the end of the document.
  • The Page Up and Page Down keys do 'exactly what it says on the tin'; they move the cursor one page up or one page down.

You probably already use the cursor keys (the ones with arrows on) to navigate around your compositions, moving one character at a time. If you hold Ctrl and press the left or right cursor keys you can jump one word at a time, left or right.

You should now be able to whiz around your documents, but what about keyboard shortcuts for selecting bits of the text? To select, simply hold down the Shift key as well as the key combinations I already mentioned.

  • Holding down Shift and pressing a cursor key will select one character to the left or right, dependent on which cursor key you press.
  • Hold Shift and press Home to select the text from the cursor position to the beginning of a line. Shift and End selects the text from cursor to end of line. So, a quick way to select a line of text is to press Home, then Shift and End.
  • Holding down Shift and Ctrl together and pressing Home will select all the text between the cursor position and the start of the document. Shift, Ctrl and End will select all the text between cursor and end of document.
  • To select the whole document you could press Ctrl and Home to take you to the top, then Shift, Ctrl and End to select to end, but it is much easier to use the keyboard combination for selecting the whole of a text: Ctrl and A.
  • Holding down Shift, Ctrl and pressing a cursor key will select one word left or right, dependent on which cursor key you press.

So, you can whiz through your document selecting chunks of text as you go. The last selection of key combinations in this article enable you to do stuff to the text.

  • Hold down Ctrl and press C to copy the selected text.
  • Hold down Ctrl and press X to cut the selected text - that is to copy it and delete it.
  • Hold down Ctrl and press V to paste the copied text where the cursor is located.

Whereas, it is easy to remember the key combination for copy (Ctrl+C) the combinations for cut and paste are not so intuitive. When I first started using these particular keyboard shortcuts I remembered the cut combination because the X looks like a pair of scissors, and the V looks a little like an upturned glue pot (a little imagination is required I know).


Play around with all these key combinations in this text box.


Some text boxes allow you to use 'rich text', that is, text that has extra formatting options such as bold, italic or underline.

  • Hold down Ctrl and press B to make the selected text bold.
  • Hold down Ctrl and press I to make the selected text italic.
  • Ctrl and U will underline the selected text.

Thankfully all three of these are intuitive, so no need for imaginative mnemonics to remember them.

Friday, 31 August 2007

Weekend website: Google Groups

I doubt that anyone visiting this page hasn't heard of Google, however, some of you may not be aware of Google Groups. From this site you can search a variety of Usenet newsgroups (a forum/BBS system that predates the web), as well as Google's own groups. This page can be exceptionally useful when you are searching for help and advice about computer problems - after you have checked for help on this page, of course. The chances are you are not the only one with a particular problem. Someone has probably asked for help with it before and maybe received an answer on Usenet.

Students should also be interested Google Scholar, which can be used to search for academic books and journal articles.

Thursday, 30 August 2007

Keyboard shortcut of the week: refreshing changes

Need to refresh or reload the web page you are looking at? Press the F5 key.

If the web page still doesn't appear or does not look right you could try Ctrl + F5 (hold down the Ctrl key and press F5). This keyboard shortcut bypasses any copy of the web page that may be stored on your PC. Web browsers will keep a copy of web pages you visit in something called a cache, which they will access first when you return to that page.

See the last post on Bloody Computer! for information about clearing this cache in Internet Explorer. If you use Firefox you can empty the cache by following these instructions:
  • In Firefox, go to the 'Tools' menu and select 'Options..'
  • Click on the 'Advanced' icon
  • Click on the 'Network' tab
  • There you will find a button labeled 'Clear now', pressing this will empty the cache.

Wednesday, 29 August 2007

Where has all my hard-drive space gone?

Just as you can never have enough cupboard space in your home, you can never have enough hard-drive space. Nevertheless, occasionally we all have to sort through our storage and throw out a few things to make some more room. This is often easier said than done when it comes to your PC as it is not always clear what is taking up all the space.

The free version of TreeSize provides a graphical representation of how much hard-drive space your folders are using. Simply right-click on a particularly bloated folder and click on 'Explore' from the menu. This will open up that folder so you can set about deleting any files that are surplus to requirement. Remember to empty the recycle bin when you are finished. I would suggests that you leave the 'Program Files' and 'Windows' folders alone unless you know what you are doing.

If you use Internet Explorer you may want to delete its cache of temporary files. From the 'Tools' menu select 'Internet Options' and click on the 'Delete Files' button. Also, the save files of many computer games can be quite large. You may want to delete a few of these and the best way to do so is within the game. Usually this facility is located on the 'load game' screen.

Wednesday, 22 August 2007

Keyboard shortcut of the week: windows hopping

Ever need to swap windows while you are using the keyboard? Need to jump quickly from that email you are composing to the report you are supposed to be writing? Then try holding down 'Alt' key and pressing the 'Tab' key. Select the window you want and release the 'Alt' key to bring that one to the front.

While we are on the subject of the 'Tab' key. Whenever you are filling in a form in a Windows program, the 'Tab' key will generally move the cursor to the next field or button. Hold down the 'Shift' key and press the 'Tab' key to move the cursor back to the previous field. Filling in a whole form from the keyboard means you get the job done more quickly and more easily, leaving more time available to 'alt-tab' back to that blog you were reading.

Try these shortcuts out on the following form. Click on the first field to select it, then tab between fields to your heart's content.

Field1:
Field2:
Field3:
To change value press the space-bar when selected:
To change the value here use up and down cursor keys:

Sunday, 19 August 2007

Weekend website: Netvibes

It took me a while but at last I found it. The personal start-page that suits me best: Netvibes (www.netvibes.com). It may not be as quick as iGoogle, but it has all the features that I need: access to my emails, my web feeds; my del.icio.us bookmarks; and many useful widgets to add. To set up your own Netvibes start-page visit the site and click on the 'Register now' link.

Many of the websites that you regularly visit will have associated web feeds. Some of these may have a button that you can click to add the site's feed to Netvibes, like this one...
Add to netvibes
If not, you can ask Netvibes to check whether your favourite site has feeds.
  • Copy the URL (web address) of your favourite webpage, e.g. 'http://bloodycomputer.blogspot.com'
  • If you don't see 'Browse content' bar on the left of your Netvibes page, click the 'Add content' link (top left hand of page).
  • Click 'Add a feed'.
  • Paste the URL into the space after 'Link' and click 'Add'.
  • Repeat this process for all your favourite pages.
You can then edit the settings for that feed, or for any of the widgets you have added, by hovering over the title bar of the widget and clicking 'Edit'. I tend to set my feeds to 'Open directly on the site', so that when I click on them, I am taken to the original article. Have a play around and see what you think. If you like Netvibes, set it as your start page and enjoy a personalised newspaper of the information you want.

If you find Netvibes to be too slow for your purposes try iGoogle. For advice on using it see Aidan Henry's excellent article iGoogle: The Epitome of Google Personalization.

There are many other personalised start pages on the web. If you want to learn more read 14 Personalized Homepages Compared, Feature by Feature on Mashable, which is the best source of social networking news and views - definitely worth adding to your Netvibes page.

Thursday, 16 August 2007

Making Windows run faster: programs that run automatically

The more programs you have running on your computer the slower it is. So one way to squeeze better performance out of your PC is to run fewer programs. Many applications you have installed will run programs when you start up Windows. Not all of these programs are essential, although, some are - such as your virus checker and anti-spyware software. In this article we will look at the various ways that Windows runs these programs and how to remove the non-essential ones.

The safest way to stop these programs from running is to tell them not to run in the first place. If you look down by the time on your taskbar you will see a line of icons. Each of these icons indicates a program that is running. Hover the mouse over them to see what they are. Select one that you have decided is non-essential, for example, an icon for a media player update checker. Right-click on the icon to reveal a menu. From this menu select 'Options', 'Settings' or 'Preferences' (whichever appears). Look around these options and try to find one that says something along the lines of 'Run at start-up.' De-select this option and the next time you start Windows that icon should no longer appear.

You may find a few icons from applications that you installed and now never use. The best way to deal with these is to uninstall them. To do this go to 'Add/Remove Programs' in your Control Panel. (Comment to this article if you need help doing this. If there is enough interest I will write a beginners guide to removing applications).

Windows has a number of other ways to start programs: there is a Startup folder in the All Programs section of your Start Menu; there are settings in the mystical thing known as the Registry. To manage all these I use Mike Lin's excellent free Startup Control Panel. Follow the instructions on the Mike's website to install and run the program. A major advantage of Startup Control Panel is that you can remove the tick from the entries on the various tabs and see what the results are. If you then decide that you do need to run a program when Windows starts you can go back to Startup Control Panel and tick them again.