Sometimes a MS Word document requires separate numbering systems for different sections. The introduction may have to be numbered with Roman numerals (i, ii, iii, etc), while the main body of the text may require normal Arabic numerals (1, 2 3, etc). There is a way of achieving this in Word without having to save the different sections as different files.
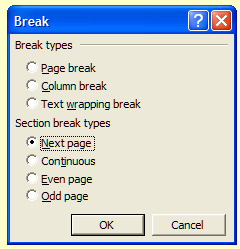
To start, you have to let Word know that the text is split into different sections. To do this, move the cursor to the end of the first section. To mark the end of that section pull down the 'Insert' menu and click on 'Break...' This will open a dialogue box offering a variety of breaks that you can insert. Select 'Next page' from the 'Section break types' list. Click 'OK' to close the dialogue box.
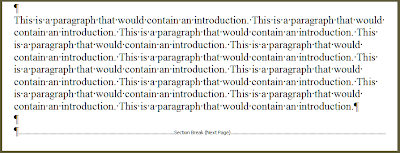
 This will move the cursor onto the next page. To see the 'Section break' click on the 'Show/hide paragraph' toolbar button (pictured left). If you wish to add any text to the first section it must be put before this section break.
You can now add the page numbering. To do this we need to access the header or the footer (the areas above or below the text where the page numbers will go). In this tutorial the page numbering will be put in the footer. Pull down the 'View' menu and select 'Header and Footer'. Notice how the text turns grey, how two boxes appear on each page, and the appearance of a 'Header and Footer' toolbar. Click inside the footer for Section 1 and then on the 'Insert Page Number' button on the toolbar (shown right).
 You will see that page numbers are now shown in the footer. You can align page numbers as if they were normal text. To change the format to Roman numerals click the 'Format Page
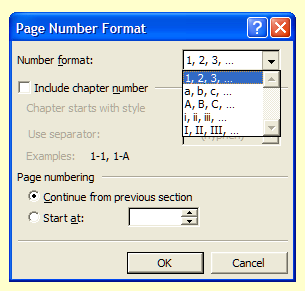
  Number' button (shown left). A dialogue box will open, pull down the 'Number format' list, select 'i, ii, iii, ...' and click on 'OK'.
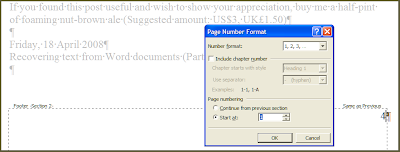
 You now need to reformat the numbers in the second section. Move down to the section 2 footer and click inside it (you will notice that the page numbers are still in Arabic numerals in this footer). Click on the 'Number format' button and in the 'Page numbering' section select 'Start at' and make sure the number is '1'. Click 'OK'.
To finish click the 'Close' button on the 'Header and Footer' toolbar.
To start, you have to let Word know that the text is split into different sections. To do this, move the cursor to the end of the first section. To mark the end of that section pull down the 'Insert' menu and click on 'Break...' This will open a dialogue box offering a variety of breaks that you can insert. Select 'Next page' from the 'Section break types' list. Click 'OK' to close the dialogue box.

 This will move the cursor onto the next page. To see the 'Section break' click on the 'Show/hide paragraph' toolbar button (pictured left). If you wish to add any text to the first section it must be put before this section break.
You can now add the page numbering. To do this we need to access the header or the footer (the areas above or below the text where the page numbers will go). In this tutorial the page numbering will be put in the footer. Pull down the 'View' menu and select 'Header and Footer'. Notice how the text turns grey, how two boxes appear on each page, and the appearance of a
 'Header and Footer' toolbar. Click inside the footer for Section 1 and then on the 'Insert Page Number' button on the toolbar (shown right).
 You will see that page numbers are now shown in the footer. You can align page numbers as if they were normal text. To change the format to Roman numerals click the 'Format Page
  Number' button (shown left). A dialogue box will open, pull down the 'Number format' list, select 'i, ii, iii, ...' and click on 'OK'.
 You now need to reformat the numbers in the second section. Move down to the section 2 footer and click inside it (you will notice that the page numbers are still in Arabic numerals in this footer). Click on the 'Number format' button and in the 'Page numbering' section select 'Start at' and make sure the number is '1'. Click 'OK'.
To finish click the 'Close' button on the 'Header and Footer' toolbar.

