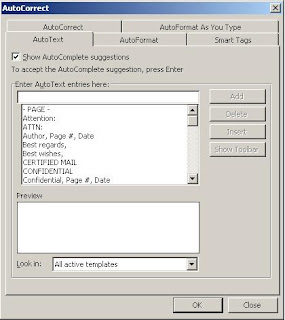
 If this does not appear, you probably have AutoComplete switched off. To switch this on, and to see a list of all the existing AutoText entries, pull down the 'Insert' menu and from the 'AutoText' sub-menu click on 'AutoText...', which will open the following dialog box.
Make sure that 'Show AutoComplete selections' is ticked. You can also create a new AutoText entry with this dialog by typing the text where indicated and clicking the 'Add' button; however, there is an easier way to do it.
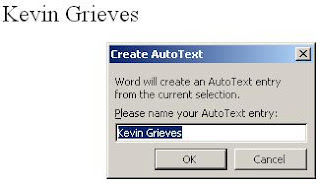
Click on 'OK' to close the dialog box and in your current word document type your name. Select the text and either pull down the 'Insert' menu, then the 'AutoText' sub-menu, and click on 'Add...' or simply hold down the Alt key and press F3. You will then be asked to give the new AutoText entry a name.

From now on when you start to type your name you will be offered the option to insert it as with 'Cordially'. The advantage of entering new AutoText this way is that you can insert text that spans several lines like your postal address. All you need to do is type it in select it and press

 Alt and F3, as before. You can even add pictures to AutoText by selecting them along with some text or on their own and following the above instructions.
0 comments:
Post a Comment