Sunday, 30 December 2007

Keyboard shortcut of the week: save and backup regularly

Your PC can crash at any time. Not a comforting thought I know, but one that should prompt us all to save our work as often as possible. So, for this end of the year post I will extol the virtues of saving regularly, and by extension, of backing up your files.

Firstly let's deal with saving your files regularly: to do so, simply hold down the Ctrl key and press S.

If you wish to use a different filename each time you save, hold down the Alt key and press F then A. This will open up the 'Save as...' dialog box.

Now the backing up your files. Since we are fast approaching a new year, now would be a good time to back up all your essential files. There are a myriad of ways of doing this such as using USB flash drives to backup your current projects, or using a DVD writer to back up many of your files in one go.

Another option is to set up a webmail account with lots of storage capacity as offered by the likes of Yahoo! and Google to which you can email the files you are working on. Or you could try other online storage facilities like box.net.

So make at least one New Years resolution: back up your files.
Monday, 10 December 2007

The mystery of the disappearing Taskbar.

Once in a while, Windows gets into a terrible state and the Taskbar and its Start menu disappear. This is because the software that manages these, called the Windows Explorer shell, has crashed. To deal with this, without logging off and on the computer, you have to end any existing sessions of Explorer and run a new one.

To end existing Explorer sessions hold down the Ctrl and Alt keys and press the Delete key. On some versions of Windows this will open up the 'Windows Security' dialog box, if so then press the 'Task Manager' button; on other versions you will be taken straight to the 'Task Manager' program.

To stop the Explorer shell, go to the 'Processes' page and look for 'explorer.exe'. You can sort the processes into alphabetical order by clicking on the Image Name heading. If you find an entry for 'explorer.exe', highlight it and click the End Process button and click Yes on the warning dialog. If you don't find an entry for it you can go straight to the next step.

To restart the Explorer shell, click on the 'File' menu in Task Manager and select 'New Task (Run...)'. This will open the Run dialog box, into which you can type 'explorer' and click OK. The Taskbar should now reappear.


Sunday, 9 December 2007

From screen to video: recording Windows

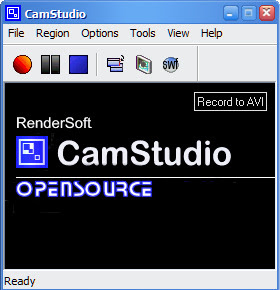
As you will have seen in my last post I have at last added video to this site. I used a handy freeware application called CamStudio to record what I was doing on my screen.

This software has some excellent features that include: recording of vocal commentary; addition of captions; and even picture-in-picture video of yourself if you have a webcam. There is some help for using the software at Nick the Geek's Support Helpdesk, but I will give you a few tips to get you started.

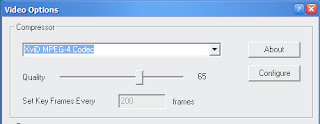
Firstly, it is best to select a different video codec (the way that the video is encoded and compressed) than the default one to keep the file sizes small. From the Options men select Video Options. Pick a compressor from the list. There is a lossless video codec available to download on the CamStudio site. You can also reduce the quality of the video on the Video Options page to further reduce the size of the video file. You will have to make sure that the people who view the video have the correct codec installed on their machine.

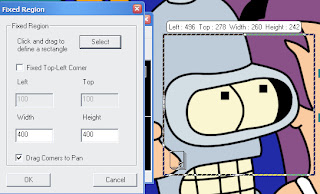
Next, select the area you wish to record. To do this pull down the Region menu and select Fixed Region (you can also record the whole screen). Click on the Select button and hold down the left-button on the mouse and drag it to select the region of the screen you wish to record.
It is best to make sure that the height and width are an even number of pixels, as this is a requirement of some video codecs. Click OK.

You can now hit the record button, the red circle, move the selection box over the part of the screen you wish to record and left-clik the mouse, and now the software will record anything that happens in that part of your screen. Click the blue square to stop recording, and then select a file name and a location for the video file.

Check out the other settings for adding audio and webcam screen-in-screen. Happy movie making.

Saturday, 8 December 2007

Keyboard shortcut of the week: control your selections

If you ever have to select more than one item at a time in a Windows program then you can use the control key, generally marked Ctrl. I find this technique particularly useful for dealing with my emails. I can hold down Ctrl and click on each spam email in turn, then take my finger off Ctrl and hit the Delete key so get rid of them all.

Using Ctrl to select multiple items also works well in Window Explorer - the software you use to browse files and programs within Windows. To try it out open up your My Documents folder, hold down the Ctrl key, and left-click on a few items with the mouse. Each item should be selected as you click on it. When you release the Ctrl key you are free to drag and drop all the files, or right-click on any one of them to apply a process - such as delete, cut or copy - to them. A much quicker way of performing a task on many files than doing each one separately.

You can also use the Ctrl key and 'lasso' items in Explorer. To 'lasso' items hold down the left mouse button and drag it to create a box that selects several items in one go. You can hold down the Ctrl key and use this technique to select several sets of items. See the following video for a demonstration of this technique in action.


Note: when 'lassoing' items with the Ctrl key pressed, be careful not to click on the icons as you will make copies of the selected files.

Friday, 7 December 2007

Tuesday, 20 November 2007

Keyboard shortcut of the week: born to run

You may have noticed that the Start menu has an item called 'Run'. The Run facility is a bit of a throw-back to the days of DOS, when we had to type commands to run programs rather than double click on icons. Nevertheless, it is still a useful tool in the Windows environment.

You can open the Run box by clicking on 'Run' in the Start menu, or you can use the keyboard shortcut: hold down a Windows key and press R.

The Windows keys have this symbol on, and are generally located near the Alt keys.


Once you have opened up the Run box, simply type in a command and hit return. To get you started here is a list of commands and the programs that they open.

calc - calculator
notepad - unsurprisingly this opens the notepad, which is a simple text editor
iexplore - Internet Explorer
firefox - Firefox
winword - Word
excel - (I think you can guess)
powerpnt - PowerPoint

[For an exhaustive list of other commands see this article on FixMyXP.com]

Another advantage of using the Run dialog is that you can quickly browse to a folder on any drive, for example you can open the 'C drive' by typing C: in the box.

The dialog will offer a drop down menu of options, so if you were to type c:\doc it should offer the option to click on c:\documents and settings. If you then type another \ at the end it should present a list of every file and folder in 'documents and settings', although, sometimes this take a little while.

So, use the Run dialog and feel like an 'old skool' techie.

Monday, 19 November 2007

Putting new buttons on toolbars in MS Office

A while ago I wrote an article that suggested that rather than printing directly from web browsers, such as Internet Explorer, it is better to copy the information that you want into a word processor and print it from there. In that article I mentioned the use of the 'Paste Special' in Word, which enables you to remove formatting from the information that you paste. In this article I will explain how to put a button for 'Paste Special' onto the toolbar in word. This technique can also be used to add any of the other available buttons onto the toolbar.

Open up word and right-click on one of the toolbars, which are at the top of the screen below the menu and look something like this:


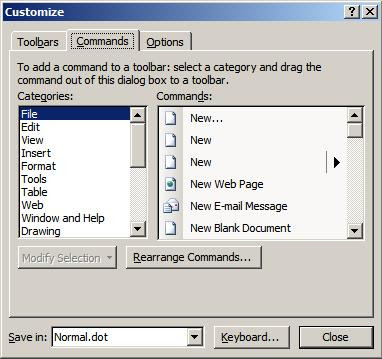
From the menu, select 'Customize...', which will open a dialog box. Click on the 'Commands' tab.


Select 'Edit' from the left-hand menu, because the 'Paste Special' tool is listed in the 'Edit' menu. Scroll down through the list on the right-hand until you see 'Paste Special' then left-click on it and hold the mouse button down. The mouse pointer should change to an arrow pointing at a rectangle with a square to the bottom right, which will have an X in it initially.

Move the pointer up to the toolbars and release the mouse button when it is in a suitable position: next to the normal paste button for example. You will notice that the mouse pointer changed appearance again when you hovered over the toolbar, with the X being replaced with a + to let you know that the new button can be placed there.

Your toolbar should now look something like this:

If you wish to remove a button from the toolbar, follow the instructions above for opening the 'Customize' dialog, but rather than drag from the dialog box to the toolbar, click on the button you wish to remove from the toolbar and drag it into the dialog box.

This process also works in the other Microsoft Office applications such as Excel and PowerPoint.