Before the rise of graphical user interfaces (GUIs) the main method of controlling computers was through text based operating systems such as MS-DOS. You can still use these old DOS commands using a facility called Command Prompt that is available in all forms of Windows. In this first part of this rough guide, we will look at how to open the Command Prompt and we will explore some of its features.
You can run the Command Prompt from the Start menu. You will find it in the 'Accessories' folder. Alternatively you can open it by typing cmd in the Run box, which you can either open from the Start menu or by holding down the Windows key and pressing R.
In Windows Vista and 7, certain commands are unavailable unless you run the Command Prompt as an administrator. To do so you can right-click on the icon in the Start menu and select 'Run as administrator' from the menu. You can also use the Run box: type in cmd as before and then hold down the Ctrl and Shift keys and press Enter. You may be required to supply an administrator password at that point.
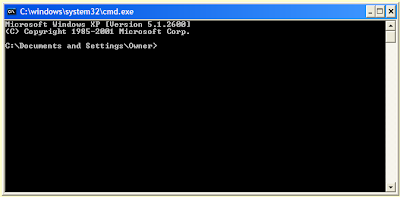
The Command Prompt will look something like this:
Click on the icon to the right of the title bar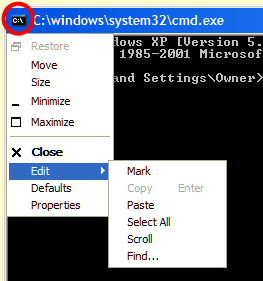 [circled in red] to open a menu. There are items in this menu to enable you to edit commands and change the look and feel of the Command Prompt. The usual copy and paste keyboard commands do not work in the Command Prompt so you will have to use the edit menu to do so. This menu offers a variety of other features including 'Find'.
To change the appearance of the Command Prompt, you can either click on 'Properties', which will alter the look and feel of the current session and, should you wish, other sessions started the same way, or you can click on 'Defaults' to change the appearance any Command Prompt you open from now on (Note: this does not over-ride changes made using 'Properties'). Either way, a box will open with a different title and a few different options depending on whether you clicked 'Properties' or 'Defaults'.
'Options' tab
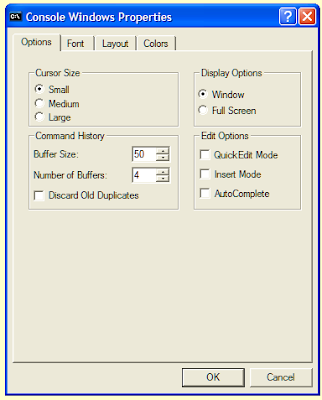
On the 'Options' tab you can change the cursor size from a thin flashing line to a flashing box. The 'Command History' settings alter the way that the Command Prompt remembers previous commands, something that we will explore in a later post. The 'Display Options' enable you to set the Command Prompt to appear full screen if you so desire.
In the 'Edit options' you can activate 'Quick edit mode', which lets you use the mouse to select text. 'Insert mode' functions in the same way as the Insert key, allowing you to either insert what you type or overwrite any text to the right of the cursor. On the 'Defaults' options there is an extra setting: 'AutoComplete'. This enables you to use the Tab key to complete folder and file names.
'Font' tab
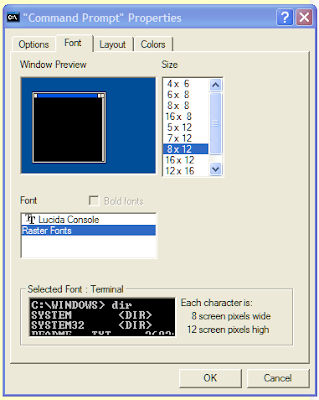
You can change the size and style of the displayed font here.
'Layout' tab
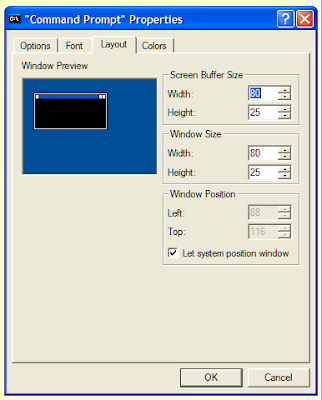
You can alter the appearance of the Command Prompt window on this tab. The 'Screen buffer size' options affect the width and number of lines, but do not change the visible screen size. Consequently you may have to use the scroll-bars to see all the text. These are particularly useful if you change the font size. The size of the window itself can be changed using the 'Window Size' settings - no surprise there. You can also decide where the Command Prompt appears on the screen using the 'Window position' settings.
'Colors' tab
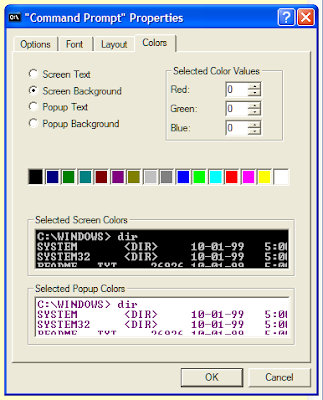
If you wish to have yellow text appear on a dark blue background, then this is where you can make it happen. You can also set the colour of the Popup text and background. We will look at some of these popups in later posts.
For those of you eager to impress your friends with your 'old school' computing skills, check out a previous post in which I looked at changing the current directory and listing its contents.
Next time I will look at a few simple commands.
You can run the Command Prompt from the Start menu. You will find it in the 'Accessories' folder. Alternatively you can open it by typing cmd in the Run box, which you can either open from the Start menu or by holding down the Windows key and pressing R.
In Windows Vista and 7, certain commands are unavailable unless you run the Command Prompt as an administrator. To do so you can right-click on the icon in the Start menu and select 'Run as administrator' from the menu. You can also use the Run box: type in cmd as before and then hold down the Ctrl and Shift keys and press Enter. You may be required to supply an administrator password at that point.
The Command Prompt will look something like this:

Click on the icon to the right of the title bar
 [circled in red] to open a menu. There are items in this menu to enable you to edit commands and change the look and feel of the Command Prompt. The usual copy and paste keyboard commands do not work in the Command Prompt so you will have to use the edit menu to do so. This menu offers a variety of other features including 'Find'.
To change the appearance of the Command Prompt, you can either click on 'Properties', which will alter the look and feel of the current session and, should you wish, other sessions started the same way, or you can click on 'Defaults' to change the appearance any Command Prompt you open from now on (Note: this does not over-ride changes made using 'Properties'). Either way, a box will open with a different title and a few different options depending on whether you clicked 'Properties' or 'Defaults'.
'Options' tab

On the 'Options' tab you can change the cursor size from a thin flashing line to a flashing box. The 'Command History' settings alter the way that the Command Prompt remembers previous commands, something that we will explore in a later post. The 'Display Options' enable you to set the Command Prompt to appear full screen if you so desire.
In the 'Edit options' you can activate 'Quick edit mode', which lets you use the mouse to select text. 'Insert mode' functions in the same way as the Insert key, allowing you to either insert what you type or overwrite any text to the right of the cursor. On the 'Defaults' options there is an extra setting: 'AutoComplete'. This enables you to use the Tab key to complete folder and file names.
'Font' tab

You can change the size and style of the displayed font here.
'Layout' tab

You can alter the appearance of the Command Prompt window on this tab. The 'Screen buffer size' options affect the width and number of lines, but do not change the visible screen size. Consequently you may have to use the scroll-bars to see all the text. These are particularly useful if you change the font size. The size of the window itself can be changed using the 'Window Size' settings - no surprise there. You can also decide where the Command Prompt appears on the screen using the 'Window position' settings.
'Colors' tab

If you wish to have yellow text appear on a dark blue background, then this is where you can make it happen. You can also set the colour of the Popup text and background. We will look at some of these popups in later posts.
For those of you eager to impress your friends with your 'old school' computing skills, check out a previous post in which I looked at changing the current directory and listing its contents.
Next time I will look at a few simple commands.


