Office 2000, XP and 2003
Open the view menu and select 'Pictures' from the 'Toolbars' sub-menu. The picture toolbar, as shown below, should appear.
 Click on the 'Compress pictures' icon (highlighted in orange on the above picture).
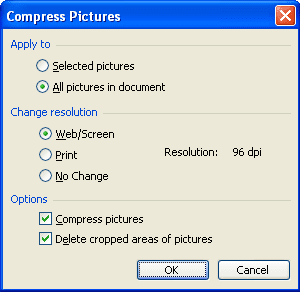
This opens the following window.

Select 'Web/Screen' for the highest level of compression, or 'Print' for a lower level. Make sure that 'Apply to' is set to 'All pictures in document', and click 'OK'.
You may then receive the following warning. If you do, click the 'Apply' button.

Office 2007 and 2010
Click on any image to enable 'Picture Tools', and click the 'Format' tab shown below.

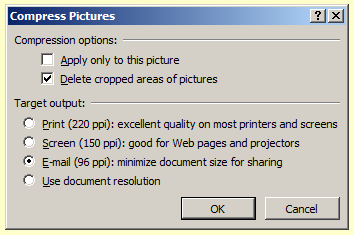
Click the 'Compress Pictures' button (highlighted in orange on the above picture), to open the following window.
 Select whichever level of compression best suits your purposes. Make sure that 'Apply only to this picture' is not selected, and click the 'OK' button.
0 comments:
Post a Comment