Eject the CD or DVD drive when your PC is switched off
You will need some sort of pin (or straightened paper clip) which you can push into the small hole on most CD or DVD drives to manually eject the tray.
Stop your DVD playback stuttering
If Windows detects a problem with one of the drives on your PC, it may reset the disk controller mode to a slower level, causing DVD play back to halt intermittently.
To fix this, right-click on 'My Computer' and click 'Manage'.
This will open up the Computer Management console: click on 'Device Manager'.
Open up 'IDE ATA/ATAPI controllers, and right-click on 'Secondary IDE Channel' and click on 'Uninstall'.
Restart your PC.
Windows should re-detect the controller and set it back to a quicker mode.
Prevent scans from showing details from the opposite side of the scanned sheet
When scanning some media, particularly newspapers, you will notice that text and images from the other side of the sheet appear on the scan. To prevent this place a dark piece of cardboard - preferably black - on top of the sheet that you are scanning.
How big?
Scanning software generally defaults to a fairly high resolution for scanning (measured in dpi - dots per inch). If you are using the scanned image or text in a word processing document or a slide-show you probably don't need the dpi setting to be all that high - 90dpi should be enough.
Setting a lower resolution means that your documents won't be so large, and if you do a lot of scanning into documents this tip will help save hard-drive space.
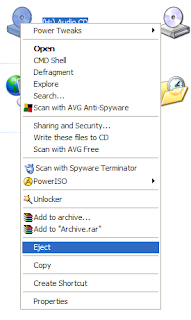
 After recently writing about context menus and the 'Applications' key, I remembered that you can eject your CD or DVD drive tray using Windows, rather than having to press that little button, which - for some reason - the drive manufacturers put beneath the tray. So if you have to reach down to your PC, you have to whip your finger out of the way so as not to impede the opening tray. To eject the drive right-click on its icon in My Computer and click on 'Eject'. Obvious really, but, no keyboard shortcut.